Tuesday, August 27, 2013

Rag quilts tutorial Tuesday

Have you ever seen those adorable rag quilts that are just so soft and look so easy, and then you try to make them and it takes forever?  I have, but that was years ago and now I think I have method down.

For this method, the quilt as you go method, you will need to cut all the squares you want for the front and then cut the same amount for the back of this quilt. 
This particular quilt I wanted to be bigger, something that could cover my nephew while he is at college, but not quite bed size.  I wanted 4 1/2" blocks when finished so I cut 6" blocks.  This lets 3/4" seam form your ragged edges.  Then you will need to cut your batting into squares, but the batting you don't want poking out on the ragged edges so ONLY cut the batting the size you want the finished blocks to be.  I cut 208 front/back/batting blocks each making this a 13 x 16 block quilt.


When all the blocks are ready, we can start putting the quilt together.  
Layer the two fabrics, right sides out with the batting in the middle.  The batting needs to be centered.

With machine quilting thread and a 90/14 needle, stitch an x across each set (top, batting & back)


When all blocks are sewn with the X across them, we can start sewing rows together.  When you see the blocks together, make sure you put the back sides together and have the fronts away from each other.  This will put the rag edge on the front of the quilt.


After the rows are all sewn, we will sew them all together.  Make sure that again while sewing these together the front is facing out and the back of the quilt is what is facing in.  Sew all rows together.  


Last (for sewing) you will sew a seam all the way around the outer edge of the quilt.  Sew this 3/4" from the edge.  I actually sewed a double seam, making it stronger.

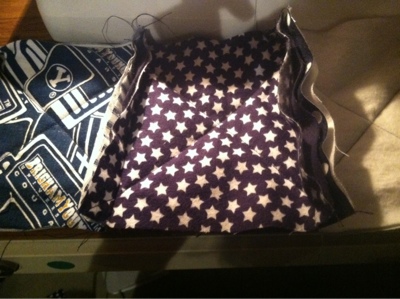
After all the sewing go around and cut all the edges poking out on the top.  You will need strong scissors.  I recommend.  Make sure that you do not cut the seam, if you do you will have to resew it and give it really good reinforcements.  

This is what the edges look like after it's knipped and washed:

And here is my finished quilt!  

Tuesday, August 6, 2013

Tuesday Tutorials: Dresden plate

If any of you know me, you know that yellow and grey are just not my colors.  Yet, when I was walking through my fabric store, The Cotton Shop, the other day I fell is love with this fabric lines by Jackie Studios (there is also 1-2 fabrics by Camelot Fabrics).  I really was drawn to these fabrics and just had to get them.  BUT FOR WHAT?  Do quilters really need to ask that question when purchasing fabric?  No! Yet my husband continues to think there must be a purpose for my fabric purchases.

It just so happened that this store was having a fun class on using the dresden plate.  This is just what I have been wanting to do and just what use lots of prints of this fun fabric!  

It turned out that the dresden plate was so much easier than it looked.  
You will need:
a template, I have the EZ Quilting My an Easy Dresden Quilt template
rotary cutter & mat
at least 5 different colors of fabric
white (or any solid) fabric for the background)
sewing machine & accessories

Tip #1 the Block will turn out much larger than you think it will.  I cut some of my wedges with 6" strips of fabric and they create a 14 1/2" circular block.  Other wedges were cut with 5" strips of fabric and they created a 12" circular block.  

Start out by cutting your fabric into strips the width that you want your wedge length to be.  With these strips and your rotary cutter cut your wedges rotating back n forth as shown above.  You will need 20 wedges per circular block, so I made 4 of each color per block.  

  
After all the wedges are cut, fold the wide end of the wedge in half (right sides together) and stitch them.  You can see I like to chain stich making these steps go so much faster


Next we turn the seam right side out and finger press open.  Iron this now so that it will lay straight.


Now you can start sewing the wedges together, make sure you backstitch the top of the wedges so that they will not come undone.

After each addition you will need to iron the pieces to keep them straight.  Ironing is VERY important to get your dresden block to lay straight.


Keep all the seams going the same directions while ironing so that it will lay much better.

I stiched 4 groups of 5 together and then stitched those four quarters together

Next the dresden circles all need appliqued onto their background.  You can decide which way you would like to applique these on, I am doing the applique by had.


Next circles will need to be appliqued to the center of the dresden 'flowers'.  Mine have yet to be finished but I will be using 5" circles for the 6" dresden wedge flowers and 3 1/2" circles for the 5" dresden wedge flowers.

Last of all you finish this like you would any quilt  with your backing, batting, quilting and binding.  Then I will have a beautiful table runner for my dining room table.