Thursday, September 12, 2013

Crayon: Part 1

My dear daughter #2 decided that since I am making a Belle dress for her older sister, I needed to make her a costume also.  Thankfully her and her bestie decided that thy wanted to be crayons this year.  
After searching the computer, we decided on a duck tape costume.

We decided that because you tightly wrap the duck tape around your body to make the dress, we would wrap the older sister.  This way it wouldn't be so tight of a costume.  


First you wrap your body in a prewrap, we purchased this at Claire's boutique.

After the pre wrap, I wrapped one strip of duck tape around the top, one strip around the bottom and four strips vertically connecting the horizontal strips.


All that's left is spinning the duck tape around and around until their body is fully wrapped.

I then, carefully, cut the dress off of my daughter.  After doing this I reinforced all 4 sides with duck tape folded over them.


As you can see it doesn't lay flat with the normal curves of a body.  

Next I will:
1. Put Velcro all along the back, closing the back of the dress
2. Create the shoulders
3. Decorate the crayon with black duck tape


Wednesday, September 11, 2013

WIP Wednesday

I'm continuing to work on the quilts I am making for my niece and nephew.  They should have been finished two weeks ago but they are not quite there yet. 

 My nephews quilt:

As you can see it almost finished just a few more cuts.

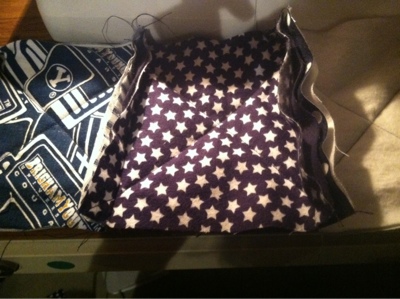
My nieces quilt still needs three borders added around the main quilt as well as all the quilting/binding:
Hopefully this Friday his quilt will be finished and next Friday I can complete hers!

I linked it up with WIP wednesday

Monday, September 9, 2013

Belle

Hailey wants to be Belle this year for Halloween.  While at Swiss days craft fair, we saw some beautiful Belle dresses but they were each around $150.  We're not going there for an 11 year olds dress.  Yet, she can't wear a kids dress, they're all to small. Even the Disney stores are to small.  So,.....mom to the rescue, I guess I'll be making the dress this year.

I started the process by looking at dresses and patterns.  I really didn't like the patterns at Joann's, just not Hailey enough.  We did purchase all the fabric, I think we'll be able to make it for about $55.  I did opt out of the cheaper costume satin, it's just to thin.  It was only a 1/3 of the price, but not worth the cheapness.

So this is the dress we are using as a guide


And here is another idea


I'll make sure to post what's happening with this dress soon!

Tuesday, August 27, 2013

Rag quilts tutorial Tuesday

Have you ever seen those adorable rag quilts that are just so soft and look so easy, and then you try to make them and it takes forever?  I have, but that was years ago and now I think I have method down.

For this method, the quilt as you go method, you will need to cut all the squares you want for the front and then cut the same amount for the back of this quilt. 
This particular quilt I wanted to be bigger, something that could cover my nephew while he is at college, but not quite bed size.  I wanted 4 1/2" blocks when finished so I cut 6" blocks.  This lets 3/4" seam form your ragged edges.  Then you will need to cut your batting into squares, but the batting you don't want poking out on the ragged edges so ONLY cut the batting the size you want the finished blocks to be.  I cut 208 front/back/batting blocks each making this a 13 x 16 block quilt.


When all the blocks are ready, we can start putting the quilt together.  
Layer the two fabrics, right sides out with the batting in the middle.  The batting needs to be centered.

With machine quilting thread and a 90/14 needle, stitch an x across each set (top, batting & back)


When all blocks are sewn with the X across them, we can start sewing rows together.  When you see the blocks together, make sure you put the back sides together and have the fronts away from each other.  This will put the rag edge on the front of the quilt.


After the rows are all sewn, we will sew them all together.  Make sure that again while sewing these together the front is facing out and the back of the quilt is what is facing in.  Sew all rows together.  


Last (for sewing) you will sew a seam all the way around the outer edge of the quilt.  Sew this 3/4" from the edge.  I actually sewed a double seam, making it stronger.

After all the sewing go around and cut all the edges poking out on the top.  You will need strong scissors.  I recommend.  Make sure that you do not cut the seam, if you do you will have to resew it and give it really good reinforcements.  

This is what the edges look like after it's knipped and washed:

And here is my finished quilt!