Tuesday, August 27, 2013

Rag quilts tutorial Tuesday

Have you ever seen those adorable rag quilts that are just so soft and look so easy, and then you try to make them and it takes forever?  I have, but that was years ago and now I think I have method down.

For this method, the quilt as you go method, you will need to cut all the squares you want for the front and then cut the same amount for the back of this quilt. 
This particular quilt I wanted to be bigger, something that could cover my nephew while he is at college, but not quite bed size.  I wanted 4 1/2" blocks when finished so I cut 6" blocks.  This lets 3/4" seam form your ragged edges.  Then you will need to cut your batting into squares, but the batting you don't want poking out on the ragged edges so ONLY cut the batting the size you want the finished blocks to be.  I cut 208 front/back/batting blocks each making this a 13 x 16 block quilt.


When all the blocks are ready, we can start putting the quilt together.  
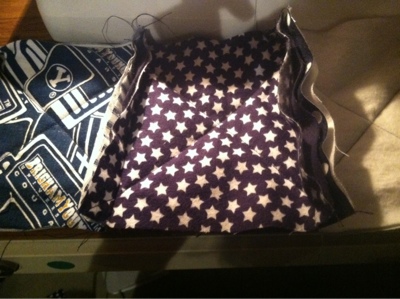
Layer the two fabrics, right sides out with the batting in the middle.  The batting needs to be centered.

With machine quilting thread and a 90/14 needle, stitch an x across each set (top, batting & back)


When all blocks are sewn with the X across them, we can start sewing rows together.  When you see the blocks together, make sure you put the back sides together and have the fronts away from each other.  This will put the rag edge on the front of the quilt.


After the rows are all sewn, we will sew them all together.  Make sure that again while sewing these together the front is facing out and the back of the quilt is what is facing in.  Sew all rows together.  


Last (for sewing) you will sew a seam all the way around the outer edge of the quilt.  Sew this 3/4" from the edge.  I actually sewed a double seam, making it stronger.

After all the sewing go around and cut all the edges poking out on the top.  You will need strong scissors.  I recommend.  Make sure that you do not cut the seam, if you do you will have to resew it and give it really good reinforcements.  

This is what the edges look like after it's knipped and washed:

And here is my finished quilt!  

Tuesday, August 6, 2013

Tuesday Tutorials: Dresden plate

If any of you know me, you know that yellow and grey are just not my colors.  Yet, when I was walking through my fabric store, The Cotton Shop, the other day I fell is love with this fabric lines by Jackie Studios (there is also 1-2 fabrics by Camelot Fabrics).  I really was drawn to these fabrics and just had to get them.  BUT FOR WHAT?  Do quilters really need to ask that question when purchasing fabric?  No! Yet my husband continues to think there must be a purpose for my fabric purchases.

It just so happened that this store was having a fun class on using the dresden plate.  This is just what I have been wanting to do and just what use lots of prints of this fun fabric!  

It turned out that the dresden plate was so much easier than it looked.  
You will need:
a template, I have the EZ Quilting My an Easy Dresden Quilt template
rotary cutter & mat
at least 5 different colors of fabric
white (or any solid) fabric for the background)
sewing machine & accessories

Tip #1 the Block will turn out much larger than you think it will.  I cut some of my wedges with 6" strips of fabric and they create a 14 1/2" circular block.  Other wedges were cut with 5" strips of fabric and they created a 12" circular block.  

Start out by cutting your fabric into strips the width that you want your wedge length to be.  With these strips and your rotary cutter cut your wedges rotating back n forth as shown above.  You will need 20 wedges per circular block, so I made 4 of each color per block.  

  
After all the wedges are cut, fold the wide end of the wedge in half (right sides together) and stitch them.  You can see I like to chain stich making these steps go so much faster


Next we turn the seam right side out and finger press open.  Iron this now so that it will lay straight.


Now you can start sewing the wedges together, make sure you backstitch the top of the wedges so that they will not come undone.

After each addition you will need to iron the pieces to keep them straight.  Ironing is VERY important to get your dresden block to lay straight.


Keep all the seams going the same directions while ironing so that it will lay much better.

I stiched 4 groups of 5 together and then stitched those four quarters together

Next the dresden circles all need appliqued onto their background.  You can decide which way you would like to applique these on, I am doing the applique by had.


Next circles will need to be appliqued to the center of the dresden 'flowers'.  Mine have yet to be finished but I will be using 5" circles for the 6" dresden wedge flowers and 3 1/2" circles for the 5" dresden wedge flowers.

Last of all you finish this like you would any quilt  with your backing, batting, quilting and binding.  Then I will have a beautiful table runner for my dining room table.


Thursday, June 13, 2013

Friday Sampler

I haven't had time to work on my farmers wife blocks for almost a month.  Actually this is the first Friday I have been home in four weeks.  First, we were in Seattle, then Alaska, then Colorado and now finally this week we are home.  I will try to catch up, but right now it isn't happening.

Well my blocks for this week are block #6 and block #7  

Block #6, the Big Dipper, was a very quick and easy block to make, my only problem is I didn't pay much attention and use the templates.  So...  my block turned out 9" instead of 6".  That's alright though because I was going to change the sizes to make my quilt more like this one here by Starwood quilter, having a big variety of block sizes.


Block #7 took a little more time and I had to rip a couple of scenes, just to get all those points perfect.  Don't look to close I see two mistakes I didn't fix!  This bock took a total of 36 tiny triangle blocks (template 13).  Cutting them out wasn't fun but sewing them together was worse!


I am still doing these blocks with our weekly goals from Ellie


Hailey started her summer sewing camp this week.  They made the cutest pillow cases and water bottle holders. Can't wait to see their projects in the next couple of weeks. I signed her up because I took 4H at her age and it isn't offered around here.  This will help her, hopefully some day.  At home she is working on this 4 patch quilt.  The fabric is AdornIt and we both fell in love with it in the fabric store.  She would be working on it right now, if only she hadn't accidentally broken my needle a few hours ago.


Truthfully I have to many projects going on right now.    And, I have to many new ones I want to start in my head.  Please remember I am a scrapbooker even more than a quilter, well at least I was a few months ago.  
Here are just a few of my quilting projects:

My BOM block for our local quilt store:


A wall quilt I'm working on for our (I wish) almost finished basement bedroom wall:


This is the quilt for Alyssa room in the basement.  (Looks like I'm working on the quilt as quickly as John is working on the basement!)


And this is what I started in May to be my table runner.


This is a few projects I really want to start right now:

Pink Cabin Quilt

Green Toile Quilts - Brighton Toile Handmade Qulits By Williamburg Colllection.

Bright pinwheels and happy quilting. Love the two tone pinwheels.

pinwheels and flowers
by  Cutie Pinwheel

And these Pillows by Stitches and scissors are a definite inspiration!

Rainbow Pillow - detail by Darci - Stitches, via Flickr

Obsessed with stars by Darci - Stitches, via Flickr

Red Arrow Pillow - 221:365 by Darci - Stitches, via Flickr 

These two are shown by Jenni Baker

Nordika Half-Square Triangle Pillow by Jeni Baker

Pillow Talk Swap 7 - Finished by jenib320


But this is my favorite and it's made by Ellie

Craft Sew Create: Pillow Talk {Swap} 10 Finished!

Fun quilt!


Craftsy.com has a really fun BOM program to make cute quilts.  When I saw their finished quilting knew I wanted to try this, but did I have time? Well I am a few months behind, but it is getting done.   Here is the basics of the layout, I had to change theirs a little to fit my ideas.  


Then I found this really fun Robert Kaufmann fabric line that I really loved and when adding a little bit of the random Riley Blake chevron prints, I love the look!

These are the 4 log cabin locks for the month of January.

And, here is the spring bloom block for February, I made 4 of these also.


I'm not sure what I need the quilt for, but I just had to start another project.  I only have 4 going right now and didn't have enough to do :)